Installing xTend Network Agent
This page describes how to install Ennetix xTend’s Network Agent (System Extension), for xTend version 1.0.0, Build 2
Because of Apple’s security policies, users need to take several steps before xTend can receive information about network activity on their Mac. The four steps (detailed below) are:
Step 1: Open the “Install Agent” window
Step 2: Install the Network Agent
Step 3: Activate the Network Agent
Step 4: Connect to Network Agent
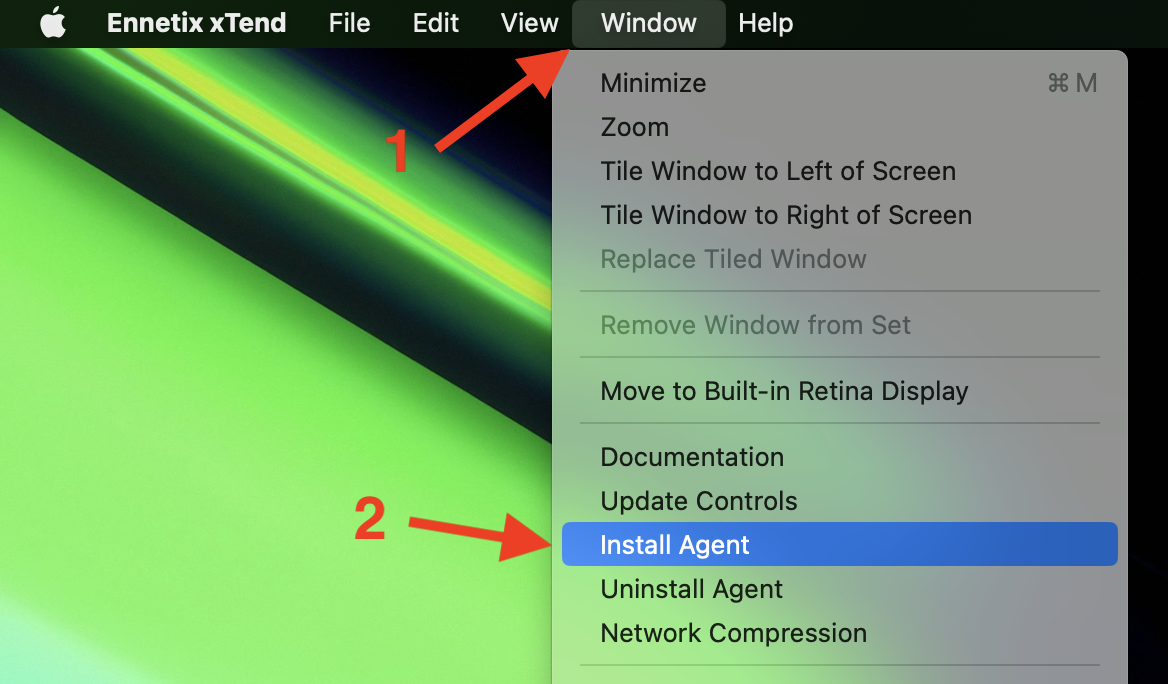
Step 1: Open the “Install Agent” window
Begin by selecting the “Window” menu (1), and then select “Install Agent” (2).
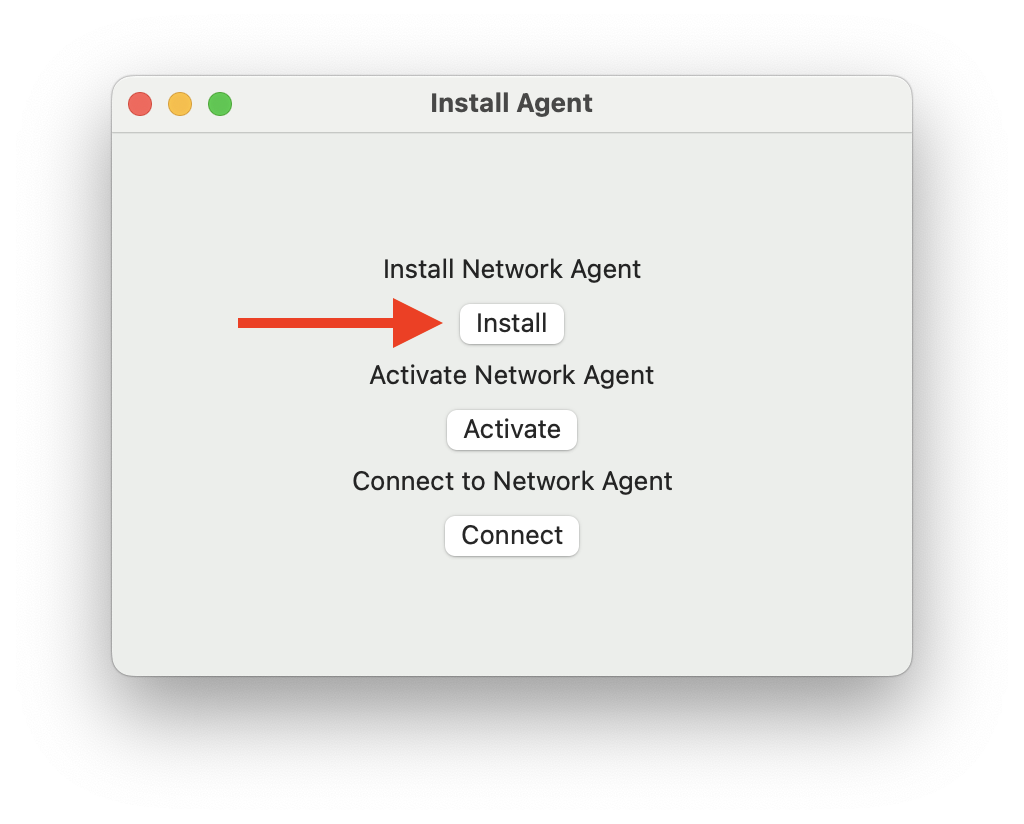
Step 2: Install the Network Agent
In the window that appears, click the button “Install”.
The Mac opens a new window. Select “Open System Settings”.
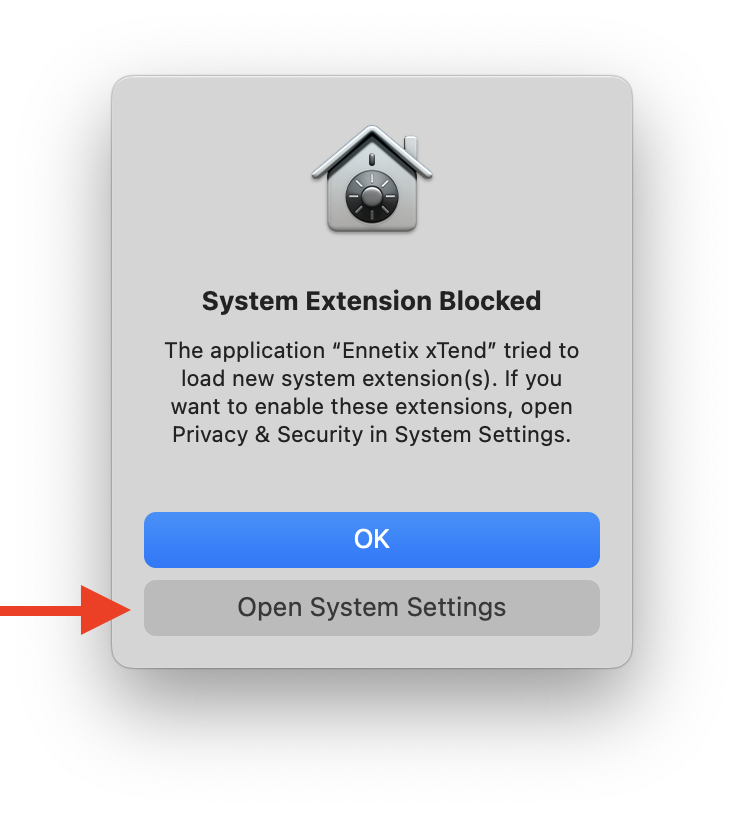
The Mac opens “System Settings” window.
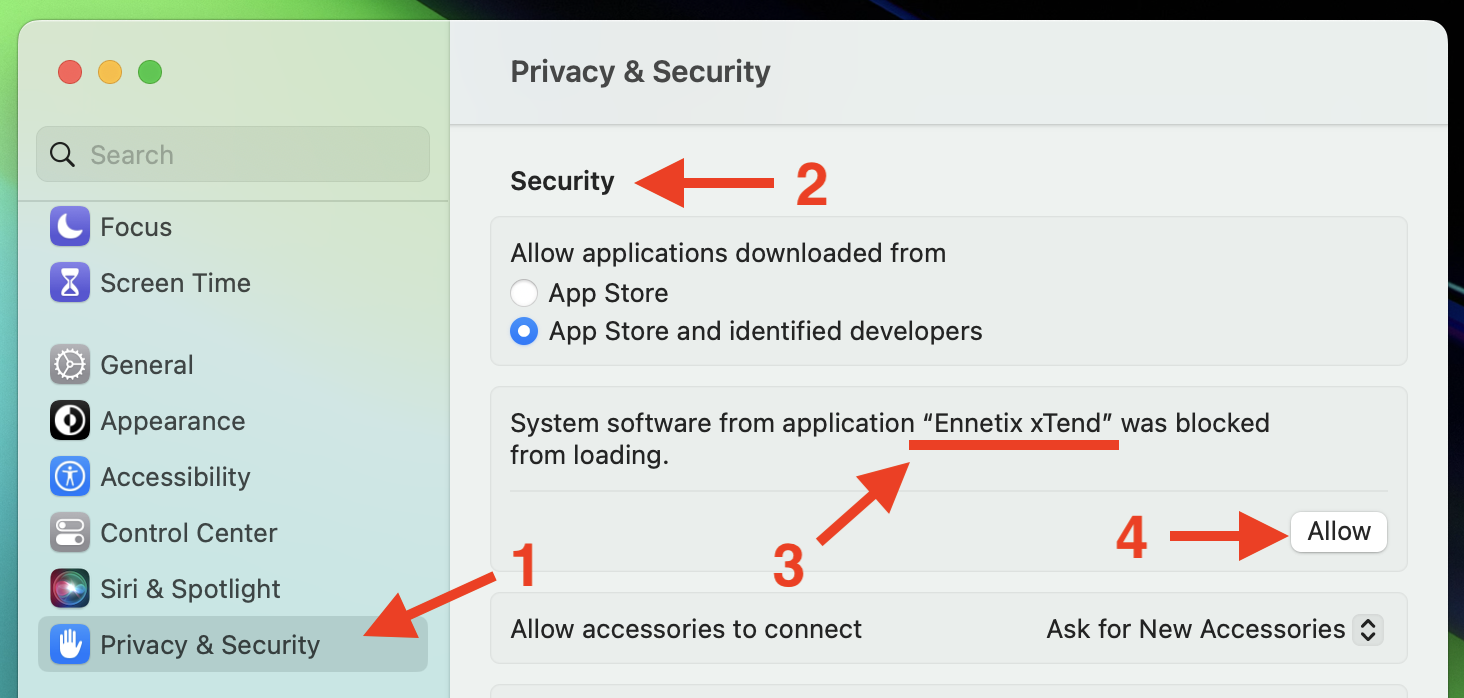
In the left pane, “Privacy & Security” should be selected (1). If not, select it.
In the right pane, scroll down the the “Security” group (2).
There should be a section saying “Ennetix xTend” was blocked (3).
Click the “Allow” button (4).
You may be prompted to authenticate yourself.
Once this is done, close the “System Settings” window.
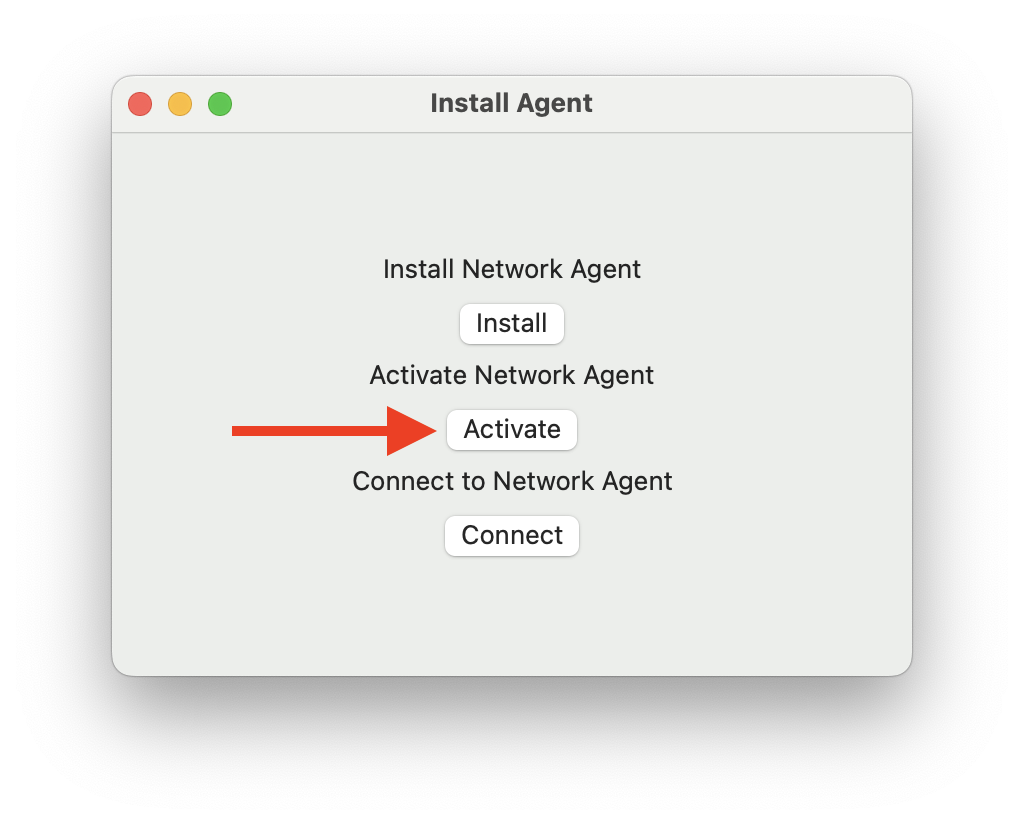
Step 3: Activate the Network Agent
Back in the “Install Agent” window, click the “Activate” button.
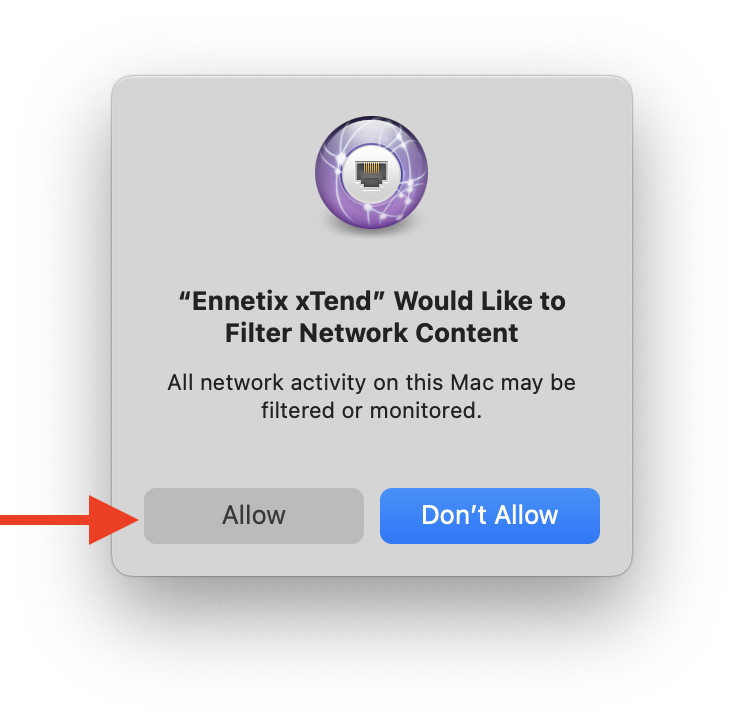
The Mac opens another window. Click “Allow”.
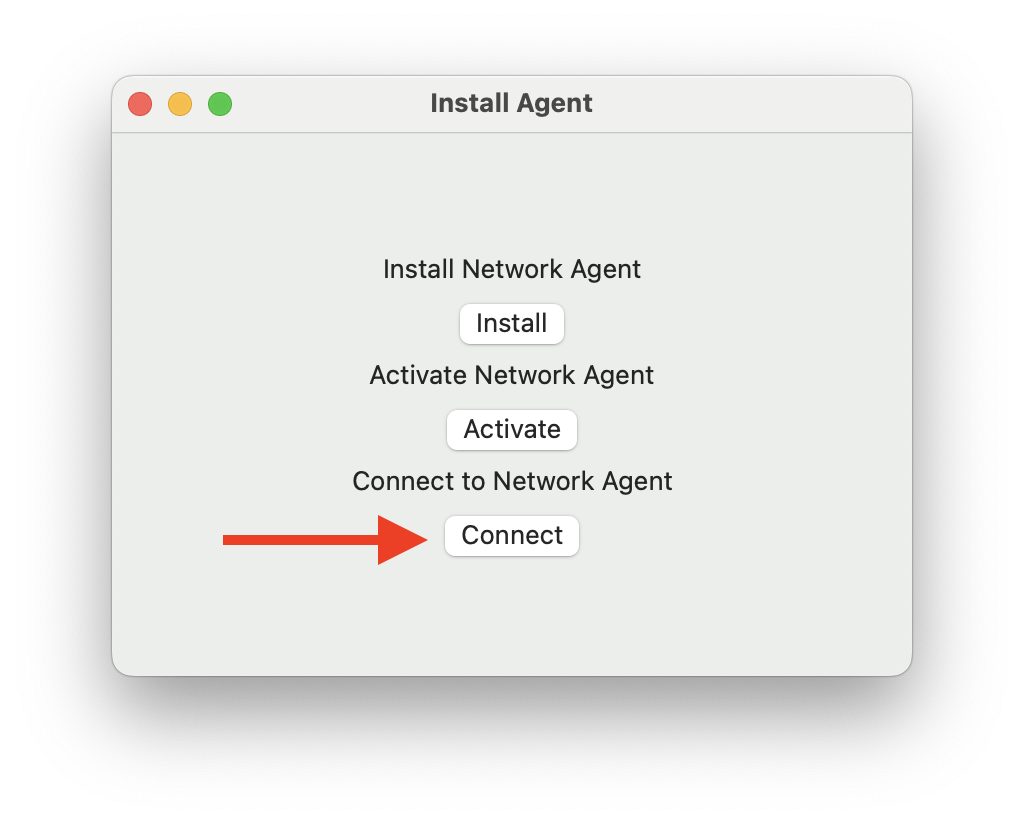
Step 4: Connect to Network Agent
Returning to the “Install Agent” window, click “Connect”.
Nothing apparently happens, but xTend will start receiving network events.